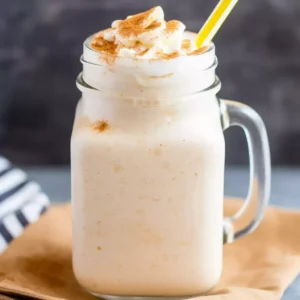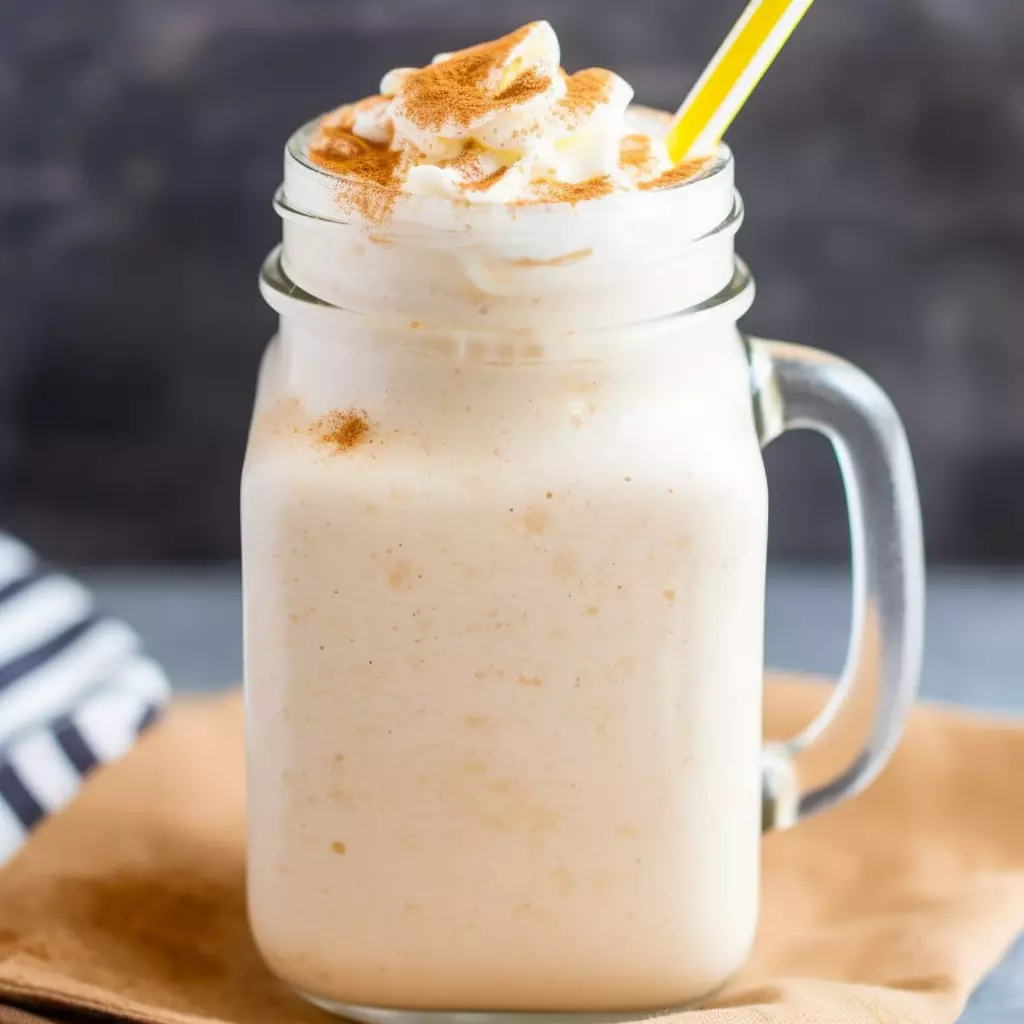
Let me whisk you off on a culinary journey with a recipe that’s close to my heart, the classic Banana Milkshake. Now, before you start gathering your bananas and dusting off your blender, let’s take a moment to appreciate the humble beginnings of this beloved beverage.
The milkshake, as we know it today, originated in the late 19th century. However, it wasn’t until the early 20th century, with the advent of electric blenders, that milkshakes began to take on their modern, frothy form.
The classic banana milkshake recipe, in particular, found its home in the quintessential American diners of the 1950s, where it was often served alongside juicy hamburgers and crispy fries. Ah, the nostalgia!
Yet, the beauty of the Banana Milkshake lies not only in its rich history but also in its remarkable simplicity. This recipe stands as a testament that the most basic ingredients, when combined with a little love (and a good blender), can transform into something truly delightful.
If you’re wondering about the difficulty level of this recipe, let me assure you, it’s as easy as pie – or in this case, as easy as blending bananas and milk.
That’s right, folks! You don’t need to be a seasoned chef to whip up this creamy concoction. Even the most novice of cooks can master the art of this Banana Milkshake recipe in no time at all.
In a world where cooking often seems daunting and recipes are getting more complex by the day, the Banana Milkshake serves as a sweet reminder of the joys of simplicity. It’s a testament to the magic that can happen when you strip a recipe down to its core elements.
So, whether you’re a cooking newbie or a culinary maestro, this recipe is sure to bring a smile to your face and a treat to your tastebuds.
When you’re sipping on that frothy, creamy, banana goodness, you’re not just enjoying a delicious drink. You’re partaking in a slice of history, a tradition passed down from generation to generation, from those old-fashioned American diners to your very own kitchen.
So, are you ready to embark on this delicious adventure? Are you prepared to delve into the world of the Banana Milkshake, where history, simplicity, and flavour converge?
Dust off that blender, gather your ripe bananas, and let’s make some magic happen! It’s time to bring that classic diner taste right into your home with our beloved Banana Milkshake recipe. Let the blending begin!
Alright, hold onto your blender lids, folks! We’re going on a grand tour of the delectable and divine ingredients in our Banana Milkshake recipe! So, let’s peel back the layers of each component and find out why they’re the rockstars of this blender concert!
Ripe Bananas: Our numero uno, the belle of the ball, the bananas! Now, we’re not just talking about any old bananas, but ripe ones. Their natural sweetness and soft texture are perfect for making our milkshake creamy and flavourful without any extra sugar.
They’re packed with potassium and Vitamin C, making this shake not just tasty, but also a bit of a health kick! If you’re all out of bananas, fret not, my friend! You can use avocados or ripe mangoes, but remember, it’ll taste a bit different.
Whole Milk: This is where we dive into the creamy, dreamy part of our shake. Whole milk gives our shake that rich, velvety texture we all crave. It’s also a fantastic source of calcium and protein. For those who are lactose intolerant, or simply want a plant-based alternative, almond, oat or soy milk can be your go-to.
Vanilla Extract: Ah, the aroma of vanilla! It’s like the cherry on top, but, you know, inside the shake. It gives our banana milkshake a depth of flavour, a certain ‘je ne sais quoi’, and also plays well with the natural sweetness of the bananas. If you’re out of vanilla, a bit of cinnamon or almond extract could give your shake a fun new twist.
Honey: Our optional sweetener. If your sweet tooth is calling, or if your bananas are a tad underripe, a dollop of honey can make all the difference. Plus, it has antioxidants! If honey isn’t your jam, maple syrup or agave nectar can take its place.
Ice Cubes: The cool kids of the group, literally. If you like your milkshake chilled, a few ice cubes can do the trick. No ice? No problem. Just use frozen bananas or cold milk instead.
Well, there you have it, the inside scoop of our Banana Milkshake recipe! Each ingredient plays its own unique part in this symphony of yumminess. Remember, cooking is an art, and you’re the artist. Feel free to tweak and twist the recipe to your liking.
Friends, Romans, milkshake lovers, lend me your ears; I come not to praise whole milk, but to explore the wide world of non-dairy alternatives!
I invite you to embark on a culinary adventure with me, as we journey through the mysteries of almond, soy, and oat milk, and discover how they can transform our beloved Banana Shake recipe.
You see, in the milkshake realm, the creamy texture of whole milk is often lauded. Yet, it’s far from the only option available for our trusty Banana Milkshake. Today, we’ll be brandishing our blenders and substituting whole milk with some plant-based options that would make any vegan cheer.
Imagine starting with almond milk. This nutty wonder not only matches the creaminess of whole milk but also adds a delightful nutty undertone to your shake. It’s a favourite in many households, and it’s easy to see why. It’s a relatively low-calorie option, and it adds a unique flavour profile that compliments the bananas beautifully.
For those who prefer a more neutral taste, soy milk might be your new best friend. It’s a smooth operator, and its relatively high protein content can make your Banana Milkshake a post-workout treat. Plus, it’s often fortified with nutrients like calcium and vitamin D, making it a nutritious addition to your shake.
The latest star on the non-dairy scene is oat milk, boasting a thicker texture that will elevate your Banana Milkshake to a creamy nirvana. Its naturally sweet flavour profile can let you skip the honey, making your shake a bit healthier. Don’t worry, your secret’s safe with me!
In conclusion, dear reader, the world is your milkshake! Substituting whole milk with a non-dairy alternative in your Banana Milkshake is not only possible but an exciting opportunity to experiment with flavours and textures.
Don’t be afraid to play around with the proportions and find your perfect blend. Just remember, in the words of the great Julia Child, “No one is born a great cook, one learns by doing.” So, grab that blender, pick your favourite non-dairy milk, and shake things up!
What’s sweeter than a ripe banana? Honey, of course! But what happens when you’ve run out, or you’re just not a fan? Fear not, my fellow shake enthusiasts, for we have a world of sweet alternatives to explore in our Banana Milkshake escapade.
First up, we have the humble maple syrup. This Canadian export doesn’t just belong on your pancakes! Its rich, caramel-like sweetness pairs beautifully with bananas, adding a subtle depth of flavour that’s simply delightful.
Next, we have agave syrup, a natural sweetener derived from the agave plant. It’s vegan-friendly and sweeter than honey, meaning you’ll need less of it to achieve the same level of sweetness. Plus, it has a low glycaemic index, making it a popular choice among those looking to control their sugar levels.
If you’re after a more exotic twist, try adding a dash of coconut sugar to your Banana Milkshake recipe. It imparts a delicious, caramel-like flavour and is packed with nutrients. You can almost hear the palm trees swaying as you sip your shake!
For those looking to keep things simple, granulated sugar or a sugar substitute like Stevia can also do the trick. Just remember to blend well to ensure everything dissolves nicely.
But who says sweeteners have to be, well, sweeteners? Ripe bananas are naturally sweet, and the riper they are, the sweeter they’ll be. If you’re lucky enough to have a batch of overripe bananas on your hands, you might not need any additional sweetener at all!
Or consider adding a few dates to the mix. Not only do they offer natural sweetness, but they also contribute to a delightful, slightly sticky texture that’s hard to resist. Just remember to remove the pits before you throw them in the blender!
Finally, there’s always the option to go rogue and try some unconventional sweeteners. Have you ever thought about adding sweetened condensed milk to your Banana Milkshake? It’s a game-changer! Or, if you’re feeling really wild, try a spoonful of your favourite jam or jelly. Strawberry-banana milkshake, anyone?
In conclusion, my sweet-toothed comrades, while honey is a stellar addition to any Banana Milkshake, it’s far from the only sweetening agent at our disposal.
Whether you’re looking for a vegan alternative, trying to control your sugar intake, or just want to try something new, there’s a world of sweet possibilities out there. So go forth, be brave, and remember: life is short, make it sweet!
Ah, servings. The bane of any recipe-follower’s existence. How many times have you found yourself in the middle of a cooking frenzy, only to realize you’ve made enough food to feed a small army?
Fear not, fellow culinary adventurers, for today we’re tackling the question that has plagued home cooks since time immemorial: just how many servings does this Banana Milkshake recipe make?
Let’s set the scene. You’ve carefully measured out your ingredients: two ripe bananas, 400ml of whole milk, a teaspoon of vanilla extract, a couple of tablespoons of honey, and a few optional ice cubes. You’ve blended everything to creamy perfection, and now you’re staring at your blender, wondering, “How many glasses will this fill?”
The answer, my friends, is two. Yes, you heard me right, two! This recipe is designed to make enough Banana Milkshake for two regular-sized glasses, each holding about 300-350ml of liquid.
Perfect for a sunny afternoon treat for you and a loved one, or if you’re feeling particularly indulgent, a double serving just for you. I won’t tell if you don’t!
Now, these servings aren’t set in stone. If you’re serving up shakes for a party, you could easily pour the mixture into four smaller glasses for a fun, mini treat. On the other hand, if you’re after a serious shake fix, you could fill one giant glass and sip to your heart’s content.
Remember, in the end, servings are just guidelines. The joy of cooking (and blending!) comes from making a recipe your own. So go forth, pour your Banana Milkshake into your glass of choice, and enjoy the fruits of your labour. Cheers!
Picture this: you’re craving a Banana Milkshake, but upon opening your fruit bowl, you find that your bananas have seen better days. They’re past their prime, overripe, and edging dangerously close to banana bread territory.
But wait! There, in the back of your freezer, you spot a bag of frozen bananas. Could it be? Can you use frozen bananas in your milkshake?
The answer, dear reader, is a resounding yes! Not only can you use frozen bananas, but they might just become your new secret weapon in the quest for the perfect Banana Milkshake.
Frozen bananas offer a number of benefits that can elevate your shake to new heights. For starters, they lend a thicker, almost ice cream-like consistency to your shake, giving you a richer, creamier texture that’s a delight to sip on. It’s like having a dessert and a drink all in one!
And let’s not forget about the temperature. Using frozen bananas gives your shake a cool, refreshing edge that’s especially welcome on those sweltering summer days. Say goodbye to those optional ice cubes in the recipe – with frozen bananas, you’ll have all the chill you need.
But perhaps the best thing about frozen bananas is their convenience. We’ve all been there – you buy a bunch of bananas, and before you know it, they’re turning brown faster than you can eat them.
By peeling and freezing your overripe bananas, you not only reduce food waste but also ensure you have a ready supply of bananas for your milkshake-making needs.
Now, there’s a bit of an art to freezing bananas. You’ll want to peel them first (trust me, peeling a frozen banana is no easy task) and break them into chunks.
Spread the chunks out on a tray lined with baking paper and freeze them until solid. Once they’re frozen, you can transfer them to a zip-top bag or airtight container for easy storage.
So, can you use frozen bananas in your Banana Shake recipe? Absolutely! Not only do they offer a fantastic texture and temperature boost, but they’re also a great way to use up overripe bananas.
So next time you find yourself with a bunch of browning bananas, don’t despair – just think of the delicious milkshakes in your future!
Friends, we live in a world full of choices. Chocolate or vanilla? Cats or dogs? Thick or thin milkshakes? While I can’t help you with the first two, I’m here to guide you through the last.
Whether you like your Banana Milkshake thick enough to stand a spoon in or thin enough to sip through a straw, I’ve got you covered.
Let’s start with thickening things up. The easiest way to add body to your Banana Milkshake is to use more bananas. Bananas are naturally creamy and will give your shake a richer, denser texture.
Just remember that adding more bananas will also increase the sweetness of your shake, so you might want to reduce the amount of honey accordingly.
Another option is to use frozen bananas, as we discussed in a previous article. They give your shake an almost ice cream-like consistency that’s absolutely divine. Plus, they make your shake nice and cold – a bonus on a hot day!
If you’re after a thinner shake, you have a couple of options. You could use less banana, although this will also reduce the banana flavour of your shake. Alternatively, you could add more milk to thin the shake out. This will give you a lighter, more sippable shake, without compromising on flavour.
And then there’s the wildcard option: ice. Adding ice cubes to your shake will not only chill it but also thin it out slightly. Just be aware that adding too much ice can dilute the flavour of your shake, so use it sparingly.
The consistency of your Banana Milkshake is really up to you. Whether you like it thick or thin, there are plenty of ways to adjust the recipe to suit your preference. So don’t be afraid to experiment and find your perfect shake consistency. After all, variety is the spice of life!
Ah, vanilla extract. That little bottle of aromatic liquid seems to sneak its way into so many recipes. It’s in our cookies, our cakes, and yes, our beloved Banana Milkshake recipe.
But what happens when we run out or simply want to shake things up a bit? Do we really need vanilla extract in our Banana Milkshake?
To answer that, we first need to understand what vanilla extract brings to the table. Its sweet, floral aroma and subtle woody flavour add depth and complexity to a wide range of dishes.
Our Banana Shake recipe, it acts as a sort of flavour bridge, tying the sweetness of the bananas and honey together with the creaminess of the milk. It’s like the glue that holds the shake together.
But let’s say you’re fresh out of vanilla extract, or perhaps you’re simply not a fan. Fear not, my flavour-seeking friends, for your Banana Milkshake can still be delicious without it!
Firstly, the bananas and honey (or your sweetener of choice) bring plenty of sweetness to the party, and the milk adds a creamy richness that’s hard to beat. Even without the vanilla, you’re still left with a delicious, refreshing shake.
If you’re looking to replace the vanilla with another flavour, there are plenty of options. Cinnamon, nutmeg, or even a splash of rum could add an exciting twist to your Banana Milkshake. Or, if you’re feeling adventurous, why not try a few drops of almond or coconut extract? The world is your flavour oyster!
In conclusion, while vanilla extract adds a lovely depth of flavour to our Banana Milkshake, it’s far from essential. Feel free to leave it out, substitute it, or play around with other flavours to make the shake your own.
After all, the best recipes are the ones that you tailor to your own tastes. So go forth, be bold, and remember: in the world of cooking, rules are meant to be broken!
We’ve all been there. You’re hosting a party, you’re running around like a headless chicken, and you’re wondering how on earth you’re going to find the time to whip up a batch of Banana Milkshakes. Well, worry no more, my frazzled friends, for I have the solution: make your shake ahead of time!
Now, I know what you’re thinking. A Banana Milkshake, made in advance? Surely not! But hear me out. With a little bit of planning and a few tricks up your sleeve, you can prep your shake ahead of time and save yourself a whole heap of stress.
First, the bananas. You can peel and break them into chunks, then pop them in the freezer. Not only does this save time on the day, but as we discussed in a previous article, frozen bananas can give your shake a wonderfully thick, creamy texture.
Next, the milk, vanilla extract, and honey. You can measure these out and store them together in the fridge. When it’s shake time, all you have to do is add your frozen banana chunks and blend until smooth.
The key to a successful make-ahead Banana Milkshake is to blend it just before serving. If you blend it too far in advance, it can separate, and no one wants a two-tone milkshake! But with your ingredients prepped and ready to go, blending takes no time at all.
So, there you have it, the secret to stress-free entertaining: the make-ahead Banana Milkshake. Now, instead of frantically peeling bananas while your guests are knocking at the door, you can calmly blend up a batch of creamy, delicious shakes in no time at all.
You’ll look like the host with the most, and your guests will be none the wiser. So go ahead, prep that shake, and take a moment to breathe. You’ve got this!
Whole milk. It’s creamy, it’s rich, and it makes a darn good Banana Milkshake. But what if you’re lactose intolerant, vegan, or simply looking for a change? Can you make a Banana Milkshake with a milk alternative?
The answer, my friends, is a resounding yes! These days, we’re spoiled for choice when it comes to milk alternatives. From almond to oat, soy to coconut, there’s a milk alternative out there to suit just about every dietary need and taste preference.
Let’s start with almond milk. It’s light, slightly nutty, and makes a great low-calorie option for your Banana Shake recipe. Just be aware that it’s not as creamy as whole milk, so your shake might be a bit lighter in texture.
Next up, we have oat milk. This is a great choice if you’re after a creamy, slightly sweet milk alternative. It’s thicker than almond milk, so it’ll give your shake a lovely, rich consistency. Plus, it has a neutral flavour that won’t compete with the banana.
Soy milk is another good option. It’s creamy and has a fairly neutral flavour, although some people find it has a slight bean-like aftertaste. If you’re a fan of soy milk in your cereal or coffee, you’ll probably enjoy it in your Banana Milkshake too.
Finally, there’s coconut milk. Now, this isn’t for everyone – it has a strong, distinct flavour that can overpower the banana. But if you’re a coconut lover, you might just find it’s your new favourite milkshake ingredient!
In conclusion, whole milk is far from your only option when it comes to making a Banana Milkshake. Whether you’re lactose intolerant, vegan, or just fancy a change, there’s a milk alternative out there for you.
So why not get adventurous and try something new in your next shake? You never know, you might just discover a new favourite!
Blending. It’s the final, crucial step in making a Banana Milkshake. Get it right, and you’ll have a smooth, creamy shake that’s a joy to drink. Get it wrong, and well, let’s just say you might end up with more of a banana chunk shake.
But fear not, dear reader, for I am here to share the secret to a perfectly blended Banana Milkshake.
First, let’s talk about equipment. You’re going to need a blender. Now, this doesn’t have to be a top-of-the-range, mortgage-your-house-to-buy-it kind of blender. Even a basic model will do the job just fine. The key is to make sure your blender is powerful enough to blend the bananas into a smooth, creamy puree.
Next, the order of operations. Start by adding your bananas to the blender, followed by the milk, vanilla extract, and honey. If you’re using frozen bananas or adding ice, put these in last. This order ensures that the heavier items are on top, helping to push everything down towards the blades for even blending.
Now, onto the blending itself. Start on a low speed, then gradually increase to high. This helps to break everything down evenly, rather than just pulverizing the bottom layer while leaving the top untouched.
Patience is key here – you want to blend your shake until it’s completely smooth and creamy. Depending on your blender, this could take anywhere from 1 to 2 minutes. Remember, a well-blended shake is a delicious shake!
Finally, don’t forget to taste your shake before pouring it into glasses. The beauty of making your own Banana Shake recipe is that you can tweak the flavours to suit your tastes. Need a little more sweetness? Add a touch more honey. Want a stronger vanilla flavour? A dash more vanilla extract should do the trick.
So, there you have it, the secret to a perfectly blended Banana Milkshake. It’s all about using the right equipment, adding your ingredients in the correct order, blending patiently and thoroughly, and tweaking the flavours to taste.
Follow these steps, and you’ll be sipping on a smooth, creamy, and utterly delicious Banana Milkshake in no time. Happy blending!
Ladies and gentlemen, we’ve reached the grand finale of our Banana Milkshake recipe journey: the toppings. This is your chance to let your creativity shine and add a little extra pizzazz to your shake. From the classic to the unconventional, there’s a world of toppings out there waiting to be explored.
Let’s start with a classic: whipped cream. It’s light, it’s fluffy, and it adds a wonderful creaminess to your shake. For an extra touch of indulgence, you could even use a flavoured whipped cream – vanilla, chocolate, or even banana-flavoured if you’re feeling particularly thematic!
Next up, we have the sprinkle of cinnamon or nutmeg. These warming spices add a lovely depth of flavour to your Banana Milkshake and complement the sweetness of the banana beautifully. Plus, they look pretty darn fancy sprinkled over the top of your whipped cream.
If you’re a chocolate lover, why not try a drizzle of chocolate sauce? It adds a decadent, dessert-like quality to your shake that’s hard to resist. Or, if you’re feeling particularly decadent, you could even add a scoop of chocolate ice cream. Now that’s what I call a treat!
For a bit of crunch, try a sprinkle of granola or crushed nuts. They add a wonderful contrast to the smoothness of the shake and give you a little something to munch on as you sip.
And finally, for the truly adventurous, why not try a sprinkle of chilli powder or a dash of hot sauce? It may sound unusual, but the heat of the chilli contrasts beautifully with the sweetness of the shake, giving you a flavour experience like no other.
So, there you have it, a world of toppings for your Banana Milkshake. Whether you prefer the classics or love to experiment, there’s a topping out there to take your shake to the next level. So go on, get creative, and add a little extra to your next Banana shake. Trust me, your taste buds will thank you!
If you loved the simplicity and creaminess of our Banana Milkshake, then you’re in for a real treat. We have a host of other delightful recipes that make use of similar ingredients and techniques.
Imagine starting your day with a refreshing Banana Smoothie, kin to our Banana Milkshake but with a healthful twist. This is one for all you fitness enthusiasts out there.
How about a dessert to die for? Our Banana Choc Chip Cake is a luscious treat that will have your taste buds dancing with joy. The combination of banana and chocolate is a classic pairing that never disappoints.
Craving something cold and decadent? Our Mint Chocolate Milkshake is a creamy, dreamy delight that will take you on a journey to an ice cream parlour from the comfort of your own home. It’s just the thing to cool down on a hot day or to indulge in after a long week.
Or perhaps you’d like to switch fruits? The Strawberry Milkshake is a luscious, creamy delight packed with the juicy goodness of fresh strawberries. It’s the perfect way to enjoy the berry season.
And let’s not forget the Oreo Milkshake. Made with the universally loved Oreo cookies, this milkshake is thick, creamy, and absolutely packed with flavour. It’s a sure hit with kids and adults alike.
For those who prefer their desserts a bit more grown-up, our Mango Lassi is a sophisticated, exotic alternative to a milkshake that’s just as creamy and satisfying.
So, why not try something new? Dive into these recipes and discover a whole new world of creamy, dreamy delights. Don’t forget to leave a comment with your thoughts. We love hearing from you!
Hi, I’m Nabeela and I love to cook! I want to share with you my favourite, delicious family-friendly recipes. I want to inspire you to create fantastic food for your family every day.
Subscribe to us to always stay in touch with us and get the latest news
about our company and all of our activities!