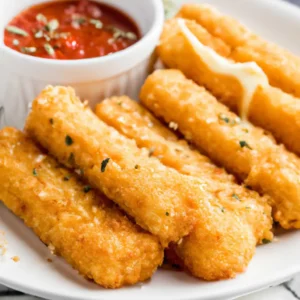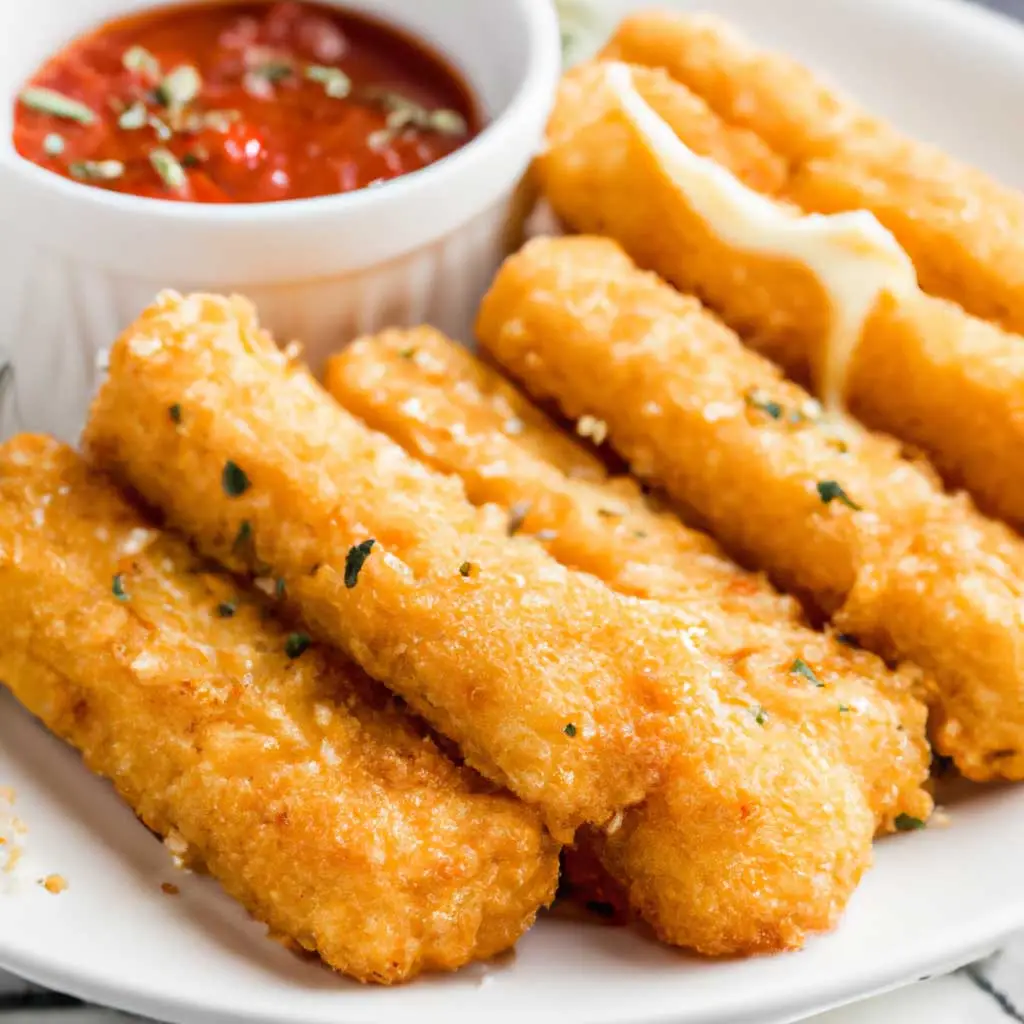
Ah, mozzarella sticks! Is there a snack more comforting, or one that brings about more nostalgic moments of gatherings with friends at our favourite restaurant? This humble appetizer, with its beautiful fusion of crunchy exterior and gooey, melty cheese, has stolen hearts globally, yet its origin remains shrouded in cheese-laden mystery.
Some food historians trace the origins of mozzarella sticks back to the 15th century when the recipe was included in ‘Libro de Arte Coquinaria,’ an Italian cookbook written by renowned chef Maestro Martino de Rossi.
The recipe, named “Roman-style fried cheese,” surprisingly has a striking resemblance to our beloved mozzarella sticks. Yet others suggest it was a late 20th-century invention, with the first recorded mention in American newspapers surfacing around the 1970s.
Wherever their true origin, one thing is certain – these golden cheese-filled sticks have become a universal favourite, seamlessly fitting into various cuisines worldwide.
From the cosy diners of America to the traditional trattorias in Italy, mozzarella sticks have found a warm spot in the hearts (and bellies) of food lovers everywhere.
Now, about the task at hand, making these beautiful sticks of joy at home – let’s just say, it’s a fun challenge. The recipe I’m about to share is classified as moderately difficult, but with a little bit of patience and a lot of love, you’re more than equipped to master it.
The technique involves several stages – cutting, coating, and frying. The steps themselves are straightforward, but achieving the perfect balance between a well-cooked crust and a gooey interior, that’s the true art of the mozzarella stick.
What’s the secret, you may ask? Well, it all lies in the freezing process. It ensures that the cheese does not melt into oblivion during the frying process and helps maintain that wonderful contrast of textures we so love in a mozzarella stick.
The ingredient list is pretty basic – mozzarella, breadcrumbs, eggs, and a little seasoning – yet when these simple ingredients come together, the result is magical. The outer layer, seasoned with Italian spices, forms a crispy shell when fried, encasing the delicious, stringy mozzarella within.
As with any recipe, a sprinkle of patience and a dollop of dedication will go a long way. Not only will you end up with an absolutely delicious treat, but you’ll also enjoy the process of making it.
Whether you’re an experienced home cook or just beginning your culinary journey, making mozzarella sticks from scratch is sure to bring you joy. And the sense of accomplishment you’ll feel when you bite into that perfectly crunchy, cheesy stick, knowing that you made it yourself, is nothing short of wonderful.
I’ve always found it fascinating how each ingredient contributes to the overall magic of a dish. Let’s take the time to dive into the components of the quintessential American snack – Mozzarella Sticks.
Although seemingly simple, each ingredient in this recipe plays a critical role, in enhancing flavour and texture.
Mozzarella Cheese: At the heart of this dish, Mozzarella is used for its impeccable melting qualities and its mild yet distinct flavour. Its consistency provides a creamy, rich texture that pulls perfectly when heated, making it the cheese of choice for our mozzarella sticks.
In case Mozzarella is unavailable, you could try substitutes like Monterey Jack or Gouda, which also melt well and have mild flavours.
Plain Flour: This is the first layer of the stick’s crust. Coating the mozzarella in flour creates a dry surface that allows the subsequent layers (egg and breadcrumbs) to adhere better.
Moreover, it forms a barrier that keeps the cheese from leaking out during frying. In the absence of all-purpose flour, rice flour or gluten-free flour mix can serve as alternatives.
Salt and Garlic Powder: These seasonings are mixed into the flour to enhance the taste. Salt, being a universal flavour enhancer, brings out the taste of other ingredients.
Garlic powder provides a subtle hint of garlic, adding depth to the flavour profile. You can replace garlic powder with onion powder or a blend of both for a different flavour profile.
Eggs: Eggs act as the glue in this recipe. After dredging the sticks in flour, we dip them into the beaten egg. It helps the breadcrumbs stick to the cheese and forms a seal, keeping the cheese from melting out when fried. You can use a mixture of milk and flour as a substitute if eggs are not an option.
Breadcrumbs: The final outer layer that gives our mozzarella sticks their classic, crispy texture. When fried, they transform into a golden, crunchy coating that contrasts beautifully with the creamy melted cheese inside. Panko breadcrumbs are a great alternative for a lighter, crispier coating.
Italian Seasoning: This is mixed into the breadcrumbs to give our sticks an aromatic punch. This blend of classic Italian herbs (like oregano, thyme, and basil) adds an extra layer of flavour to the mozzarella sticks.
In case you don’t have Italian seasoning, you can use a mix of dried herbs like oregano, basil, and rosemary.
In the journey of creating perfect mozzarella sticks, every ingredient has a unique part to play. Each contributes a note to the harmonious symphony of flavours and textures that make up this beloved snack.
From the melt-in-your-mouth cheese to the golden, crispy exterior, and the subtle nuances of flavours from the seasoning, it’s truly a culinary delight that transcends borders. With a little understanding of how the ingredients work together, anyone can make incredible mozzarella sticks right at home!
In my journey to perfect the art of making mozzarella sticks, I’ve discovered that the type of mozzarella cheese you use can make a significant difference. Let’s explore this together.
Mozzarella cheese is incredibly diverse. There’s fresh mozzarella, mozzarella di bufala, burrata, low-moisture mozzarella, smoked mozzarella, and the list goes on. Each one comes with its own distinct taste, texture, and melting characteristics.
For mozzarella sticks, the type of mozzarella cheese that has always worked for me is low-moisture, part-skim mozzarella. This type of cheese has been aged longer, and its lower moisture content allows it to hold up to the heat without releasing too much water, which can make your breadcrumbs soggy.
Low-moisture mozzarella also has a great melt that is gooey and stretchy, exactly what you want when you bite into a perfectly prepared mozzarella stick. It’s readily available and sold in blocks, which you can easily cut into sticks.
Fresh mozzarella, on the other hand, is softer, contains more moisture, and tends to get very watery when heated, which might lead to a mess in your frying oil. That’s why it’s typically not recommended for this specific recipe.
That being said, there’s always room for experimentation in the kitchen. If you prefer a different type of mozzarella cheese, feel free to try it. Cooking is all about finding what works best for you and your taste buds.
The most important thing is to have fun while you’re at it, and enjoy the delicious results of your hard work!
I’ve often been asked if it’s okay to use pre-shredded mozzarella cheese for making mozzarella sticks. Well, from my experience, it’s certainly possible, but it’s not something I would recommend. Let’s dive deeper into why that is.
Pre-shredded cheese is undoubtedly convenient, but it has some drawbacks. The primary concern is that it contains anti-caking agents like potato starch and cellulose to prevent the shreds from clumping together in the bag.
Unfortunately, these added ingredients can affect how the cheese melts and tastes.
When you bite into a mozzarella stick, you’re anticipating that delightful, stretchy cheese pull. Pre-shredded cheese, with its anti-caking agents, doesn’t melt as smoothly and can result in a texture that’s not as pleasing. The flavour may also be slightly off compared to block cheese.
When I make my mozzarella sticks, I always prefer using a block of low-moisture, part-skim mozzarella cheese. It only takes a few extra minutes to cut it into sticks, and the superior taste and texture make it worth the effort.
That said, if you’re in a pinch and only have pre-shredded mozzarella, you can still make your mozzarella sticks. They may not turn out exactly as you’d expect, but they’ll still be cheesy and delicious.
Remember, cooking isn’t just about following a recipe to the letter. It’s about using what you have, making adjustments as necessary, and creating dishes that you and your loved ones enjoy.
So whether you use a block of cheese or go for the pre-shredded option, make those mozzarella sticks with love, and they’re sure to be a hit!
When I first started making mozzarella sticks, I was puzzled about why many recipes suggested freezing the sticks before frying. It seemed like an extra, unnecessary step. But after some trial and error, I discovered the vital role that freezing plays in achieving the perfect mozzarella stick.
The purpose of freezing the mozzarella sticks is twofold. First, it helps the breading adhere to the cheese. If you’ve ever attempted to fry breaded food and ended up with most of the breading in the oil instead of on your food, you’ll appreciate how crucial this is.
By freezing the breaded mozzarella sticks, the coating becomes firm and sticks to the cheese better, which means it’s less likely to fall off during frying.
The second reason to freeze mozzarella sticks is to control the melting of the cheese.
When you fry mozzarella sticks straight from the freezer, the outer breading becomes golden brown and crispy while the inside cheese melts just enough to be gooey and stretchy, but not so much that it bursts out of the breading.
I learned this the hard way when I tried frying the sticks without freezing them first. What I ended up with was a mess of melted cheese in my frying oil and hardly any left inside the breading.
Now, I always make sure to freeze my mozzarella sticks for at least a couple of hours before frying. It’s a game-changer, and I recommend it to anyone who loves perfectly crispy and gooey mozzarella sticks. Just remember to be patient – good things take time!
As someone who adores mozzarella sticks but also tries to keep an eye on my health, I often get asked about alternatives to frying. Well, I’m here to tell you that you can indeed bake mozzarella sticks, and the results can be surprisingly delicious!
The first thing you’ll need to adjust is the temperature. Preheat your oven to a high temperature – around 400 to 450 degrees Fahrenheit. This high heat is crucial to get the outside of the sticks crispy before the cheese inside has a chance to melt too much and seep out.
Arrange the breaded mozzarella sticks on a baking sheet lined with parchment paper, ensuring they’re not touching each other. You might want to give them a light spray of cooking oil to help them brown nicely. Then, bake them until they’re golden brown and crispy.
It typically takes about 8-10 minutes, but keep a close eye on them – ovens can vary, and the cooking time might need some adjustment.
Baking mozzarella sticks will give you a lighter result compared to frying. They’ll be less oily but still delicious. You’ll still get a crispy exterior and a gooey, cheesy interior. Plus, it’s a great option if you’re trying to cut back on fried foods.
However, it’s essential to remember that even when baked, mozzarella sticks are still a treat. They’re best enjoyed in moderation. But whether you choose to bake or fry your mozzarella sticks, the joy they bring to any gathering is the same.
Enjoy the process of making them, and most importantly, savour every cheesy, crispy bite!
I know the struggle of accommodating dietary restrictions, especially when it comes to beloved comfort foods like mozzarella sticks. Luckily, with a few simple modifications, you can create delicious gluten-free mozzarella sticks that everyone can enjoy
First, instead of using regular all-purpose flour, opt for a gluten-free flour blend. There are many high-quality blends available these days that work just as well as traditional flour for breading.
Some of my favourites include almond flour and coconut flour, both of which have a slightly nutty flavour that can add a unique touch to your mozzarella sticks.
Next, swap out the traditional breadcrumbs for a gluten-free version. You can find ready-made gluten-free breadcrumbs in most supermarkets, or you can make your own by toasting gluten-free bread and grinding it up.
Alternatively, you can also use crushed gluten-free cereal or crackers to achieve that crunchy exterior.
The rest of the process is the same: cut the cheese, dredge it in the flour, dip it in eggs, and then coat it in breadcrumbs. Remember to freeze your sticks before frying or baking to ensure the best results.
Even if you’re not gluten intolerant, I recommend giving gluten-free mozzarella sticks a try. They’re just as delicious, and you might find you enjoy the slightly different flavours these alternatives bring to the table.
Throughout my culinary adventures, I’ve encountered scenarios where I’ve run out of a particular ingredient and had to improvise. For instance, what do you do if you’re out of breadcrumbs but have a craving for mozzarella sticks? Here are some breadcrumb substitutes I’ve found to work well.
Crushed crackers are one of the simplest substitutes for breadcrumbs. They’re readily available, easy to crush, and provide a nice, crunchy exterior. Choose a neutral-flavoured cracker to avoid overwhelming the cheese’s flavour.
Next up is crushed cereal. Cornflakes or rice cereals are a good choice as they’re relatively flavourless but provide excellent crispiness. Just put them in a bag and use a rolling pin to crush them to the desired consistency.
Ground oats can also be used as a substitute, although they’ll give your mozzarella sticks a different texture. However, their slightly nutty flavour can add an interesting twist to the dish.
Finally, another option is to use nut flour or a meal, like almond or coconut. These will give your mozzarella sticks a more granulated coating, and the nutty flavours can be a delicious complement to the cheese
Remember, cooking is about experimenting and discovering new tastes and textures. So, even if you have breadcrumbs on hand, you might want to try these substitutes for a change. Who knows, you might find a new favourite among these alternatives!
I love the convenience of having ready-to-cook meals in my freezer, and mozzarella sticks are no exception. Over time, I’ve found that these cheesy delights can be frozen and enjoyed later, making them a great make-ahead snack.
Once you’ve breaded your mozzarella sticks, instead of heading straight to the frying pan, arrange them in a single layer on a baking sheet lined with parchment paper.
You’ll want to make sure they’re not touching, as they can stick together once frozen. Put the baking sheet in the freezer for about an hour or until the sticks are firm.
Once they’re frozen, you can transfer the mozzarella sticks to a freezer-safe bag or container. I prefer to use bags because they take up less space, and you can squeeze out the air to prevent freezer burn. Be sure to label and date the bag, so you remember when you made them.
When it comes to using your frozen mozzarella sticks, there’s no need to thaw them. You can fry or bake them straight from the freezer. You might need to add a couple of minutes to the cooking time to ensure they’re heated all the way through.
In terms of how long you can store them, I’ve found that they keep well for about two months in the freezer. After that, they can start to lose quality, although they’ll still be safe to eat.
So next time you have some extra time on your hands, why not make a big batch of mozzarella sticks to freeze? You’ll thank yourself later!
There’s something deeply satisfying about biting into a perfectly golden brown mozzarella stick. But getting that ideal colour and crispiness can sometimes be a challenge. Through my experience, I’ve picked up a few tricks that might help.
Firstly, the oil temperature is crucial. If the oil is too hot, the breadcrumbs will brown too quickly, and the cheese won’t have time to melt. On the other hand, if the oil isn’t hot enough, the sticks can absorb too much oil and turn out greasy rather than crispy.
I’ve found that maintaining the oil temperature around 350-375 degrees Fahrenheit is the sweet spot.
Next, consider the type of breadcrumbs you use. Different breadcrumbs brown at different rates. I’ve found that panko breadcrumbs brown more evenly than regular breadcrumbs and result in a crispier texture.
However, if you’re using regular breadcrumbs, try adding a bit of paprika to the mix. Paprika can help to achieve a golden colour faster.
Finally, be sure to turn the mozzarella sticks frequently while they’re frying. This will help them brown evenly on all sides.
Remember, making mozzarella sticks is not an exact science. Don’t be discouraged if your first few batches aren’t perfect.
As you continue to experiment and practice, you’ll get a better feel for how to achieve those tantalizingly golden brown mozzarella sticks that are crispy on the outside and deliciously gooey on the inside.
When it comes to frying foods like mozzarella sticks, the type of oil used can significantly impact the end result. Over the years, I’ve experimented with different oils and have found a few that work exceptionally well.
Primarily, you want to use an oil with a high smoke point, meaning it can handle high temperatures without breaking down and creating smoke. Vegetable oil, canola oil, and peanut oil are all excellent choices.
These oils also have a neutral flavour, so they won’t interfere with the taste of your mozzarella sticks.
Personally, I lean towards using canola oil most of the time. It has a high smoke point, around 400 degrees Fahrenheit, making it safe for deep frying. It’s also readily available and reasonably priced.
Peanut oil is another favourite of mine. It has an even higher smoke point than canola oil, and it adds a subtle, nutty flavour that can complement the mozzarella sticks nicely.
However, it’s important to remember that some people are allergic to peanuts, so it might not be the best choice if you’re cooking for a crowd with unknown food sensitivities.
No matter what oil you choose, remember to let it preheat to the right temperature before you start frying (around 350-375 degrees Fahrenheit for mozzarella sticks) and adjust the heat as necessary to maintain that temperature.
While marinara sauce is the traditional accompaniment for mozzarella sticks, I love to mix things up a bit. Different sauces can bring out new flavours and make your mozzarella sticks even more enjoyable.
One of my favourite alternatives is ranch dressing. The creamy, tangy flavour of ranch pairs beautifully with the crunchy, cheesy mozzarella sticks. You can either buy a bottle of your favourite brand or make your own at home.
Barbecue sauce is another great option. Its sweet and smoky flavour adds a different dimension to the mozzarella sticks. If you like a bit of heat, you can even opt for a spicy barbecue sauce.
For a touch of sophistication, try serving your mozzarella sticks with a balsamic reduction. The sweet, tangy, and slightly acidic flavour of the balsamic provides a lovely contrast to the richness of the cheese.
If you’re feeling adventurous, why not try a sweet dipping sauce? A raspberry or strawberry sauce can make for an unusual but delightful combination. The sweetness of the sauce balances the savoury cheese, similar to pairing fruit with cheese on a cheeseboard.
Finally, for an international twist, try serving your mozzarella sticks with a spicy arrabbiata sauce or a creamy curry dip. The possibilities are endless!
Remember, food is all about exploration and enjoyment. Don’t hesitate to step away from the traditional and experiment with different flavours. Who knows? You might discover your new favourite mozzarella stick pairing!
If you’ve been smitten by the golden crisp of my mozzarella sticks, I’ve got some other must-try snacks up my sleeve! I guarantee you these will charm your taste buds and leave you longing for more.
How can you resist the allure of my Potato Croquettes? I’m talking about succulent mashed potatoes, enveloped in a crispy golden crust that’s just begging for that first bite. I ensure you, once you start, there’s no turning back!
My Cheese Balls recipe? Ah, they’re not just cheese balls. Imagine a delicate yet power-packed orb of melting cheese encased within a beautifully seasoned crust, fried to perfection. Trust me, these balls of delight will tease and tantalize your palate.
Have you ever tried my Garlic Bread with Cheese? I swear it’s like a slice of heaven! The creamy, gooey mozzarella melted over a toasty, garlicky slice of bread gives a melty-crisp combo that’s hard to resist.
Of course, you can’t miss out on my Cheese Pizza. It’s a simple and classic treat, but boy, does it pack a punch! Rich, vibrant tomato sauce, strewn with oodles of stringy, melted mozzarella and a crispy yet fluffy pizza base – it’s a slice of joy!
And if you’re craving something sweet after all those savoury delights, let me suggest my Oreo Cheesecake. It’s a delicious dessert that combines the richness of cream cheese with the beloved crunch and flavour of Oreo cookies – a grand finale to any snack fest!
Remember, I absolutely love hearing your feedback. Try these recipes out and let me know what you think in the comments section! So, are you ready to embark on this snack-tastic journey?
Hi, I’m Nabeela and I love to cook! I want to share with you my favourite, delicious family-friendly recipes. I want to inspire you to create fantastic food for your family every day.
Subscribe to us to always stay in touch with us and get the latest news
about our company and all of our activities!