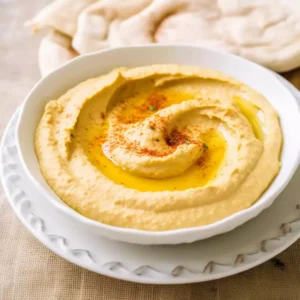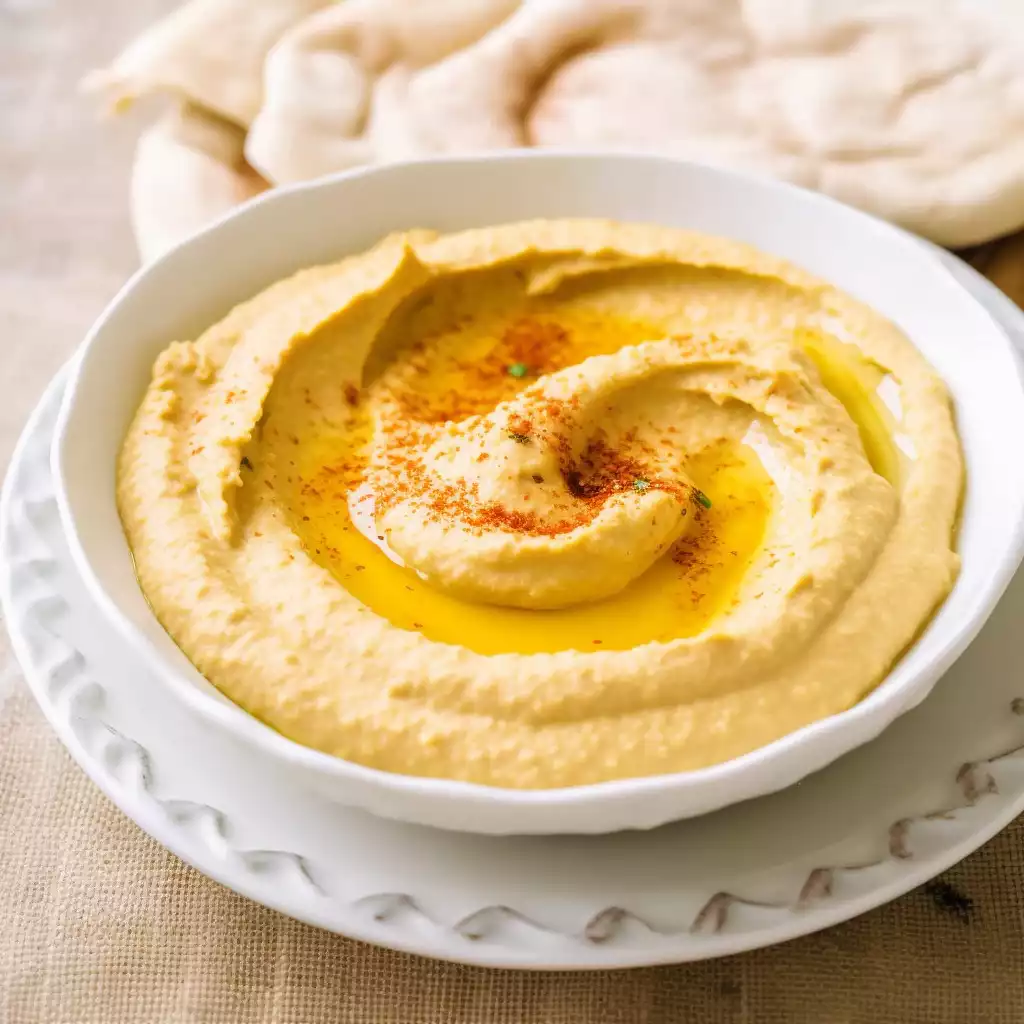
Today we’re embarking on a culinary journey to the heart of the Middle East, where a dish so simple, yet so full of flavour has captivated palates worldwide. What’s on our menu? Why, none other than the unpretentious yet totally delicious classic, hummus?
So, what is hummus, you might ask? Ah, my friend, hummus is more than just a dip. It’s a tradition, a comfort food, and a unifier of cultures. It’s a creamy blend of chickpeas, tahini, lemon juice, and garlic, infused with a rich glug of extra virgin olive oil, and an optional flourish of paprika, parsley, or more olive oil to give it that extra oomph.
Hummus, dear friends, is a dish with a past steeped in history. While it’s a challenge to trace the exact origins of hummus, one thing is for sure: it has been a staple in Middle Eastern cuisine for centuries.
The earliest recorded recipes date back to 13th-century cookbooks from Cairo, which described hummus as a cold puree of chickpeas with vinegar and pickled lemons—a bit different from our modern-day version, but the concept has remained remarkably consistent.
Over the centuries, this humble dish has spread its reach from the Middle East to the far corners of the globe, and today you’ll find hummus gracing tables from Tokyo to Toronto.
Now, as much as the history of hummus is fascinating, what really matters is how it tastes and how you can make it. You’ll be pleased to know that the recipe for this delightful dip is easier than flipping a pancake.
Yes, you heard me right! Even if you’re a newbie in the kitchen, you can whip up this delightful treat without breaking a sweat.
Making hummus is as straightforward as throwing the chickpeas, tahini, lemon juice, minced garlic, extra-virgin olive oil, and a dash of salt into a food processor.
Then, all you need to do is let the magic of technology do its work, add a bit of water to reach your preferred consistency, and voila—you have your very own homemade hummus.
While it’s simple to make, achieving that perfect blend of flavours, the right consistency, and the smooth texture can seem like an art. But don’t worry, dear foodie, once you get the hang of it, making hummus will be as easy as pie.
In the end, the best part about making hummus at home is that you can tweak it to suit your taste. Want a bit more tang? Add more lemon juice. Want it creamier? Go crazy with the tahini. The possibilities are limitless, and the journey is just as enjoyable as the destination. So, roll up your sleeves, get that food processor buzzing, and let’s make some hummus together.
The pleasure of food lies not just in the eating, but also in the understanding and appreciation of its ingredients and how they harmoniously work together. Each ingredient has a role to play, making the final dish greater than the sum of its parts.
Today, I’m diving deep into the heart of a classic dish that’s taken the world by storm – hummus. This simple yet versatile dish is a melody of ingredients that play their own part, shaping the delightful experience that hummus provides.
Chickpeas: As the base ingredient of hummus, chickpeas offer a slightly nutty taste and a wonderful creamy texture when blended. They are rich in protein, fibre, and several key vitamins and minerals.
This ingredient not only provides the hummus with its signature texture but also contributes to its nutritious value. In case you cannot find chickpeas, cannellini beans or even cooked lentils could be a good alternative, although the flavour profile would change a bit.
Tahini: Tahini, made from toasted ground hulled sesame seeds, adds a unique, nutty flavour that’s a hallmark of authentic hummus. It contributes to the creaminess and gives the hummus a slightly bitter but pleasant undertone.
If you don’t have tahini on hand, you could use sesame oil as an alternative, but the flavour would not be as robust.
Lemon Juice: Lemon juice adds a burst of freshness and tang to hummus, which balances the richness of the other ingredients. It’s the ingredient that brings out the other flavours and makes the dish more vibrant.
If fresh lemon juice isn’t available, white vinegar could be used as a substitute, but it won’t provide the same refreshing zest.
Garlic: Minced garlic infuses the hummus with a mild spicy undertone and aroma that’s both alluring and flavourful. It complements the earthy flavour of the chickpeas and tahini. As an alternative, garlic powder can be used, although it lacks the punchy freshness of raw garlic.
Extra Virgin Olive Oil: Olive oil lends a fruity, rich flavour to the hummus while also contributing to its smooth, velvety texture. It’s important to use extra virgin olive oil for its superior flavour and health benefits.
If unavailable, a good quality avocado oil could be used, but it won’t quite capture the Mediterranean essence of olive oil.
Salt: An often-underestimated ingredient, salt plays a crucial role in bringing all the flavours together, amplifying them and making the hummus taste well-rounded.
While there are no true substitutes for salt, you might adjust its quantity according to your taste and dietary needs.
Paprika, Parsley, and Olive Oil (For serving): These ingredients, though optional, are traditional garnishes that add a splash of colour, a hint of heat (from paprika), and an aromatic freshness (from parsley) to the hummus. They make the hummus visually appealing and add layers to its flavour profile.
And there you have it. The beauty of this humble dish lies in the balance and interaction of its simple yet impactful ingredients. While there are various versions of hummus worldwide, the classic hummus will always have a special place in my heart, and hopefully yours too.
As a homemade hummus enthusiast, I absolutely love the freshness and flavour of making my own hummus from scratch. One of the common questions I come across is how to store it. Today, let’s talk about the best way to store homemade hummus in the refrigerator.
Freshly made hummus, like the one from our recipe, can easily last up to a week when stored properly in the refrigerator. The key to extending its freshness is ensuring it’s stored in an airtight container to avoid the hummus absorbing other flavours present in your fridge, which can alter its taste.
After placing it in an airtight container, smooth the top of the hummus with the back of a spoon. Drizzle a thin layer of olive oil over the top before closing the lid. This additional layer of oil acts as a barrier and helps to keep the hummus fresh, maintaining its delightful flavour.
Remember to consume your hummus within the week. It’s best to check it before consuming if it has been sitting in your fridge for a while. Signs of spoilage can include a sour smell, changes in colour, or the presence of mould. When in doubt, throw it out.
One of my favourite things about homemade hummus is the ability to create smaller batches, tailored to my preference. I can enjoy it fresh without worrying about it going bad in the fridge. This is especially useful if you only consume hummus occasionally.
Storing your homemade hummus correctly not only guarantees an extended shelf life but also ensures that the flavour remains as delicious as when it was freshly made.
By taking these precautions, you’ll be able to enjoy your homemade hummus whenever the craving strikes. After all, hummus is more than a dip, it’s a lifestyle.
If you’re anything like me, you probably love making large batches of homemade hummus. There’s something incredibly satisfying about having a healthy, tasty snack ready to go whenever you need it. But then comes the question: can you freeze hummus?
Well, I’m happy to confirm that you absolutely can! Freezing homemade hummus is an excellent way to extend its shelf life, especially if you’ve made a larger batch. When properly stored, frozen hummus can last up to four months without losing its texture or flavour.
Firstly, divide your hummus into portions. This way, you can thaw just the right amount without needing to defrost the whole batch. Place each portion into a freezer-friendly container, leaving a bit of space at the top as the hummus will expand when frozen.
Alternatively, you can use a freezer bag, press out the air, and flatten it for space-saving storage.
Before freezing, I also recommend adding a thin layer of olive oil on top. This helps to prevent freezer burn and keeps the hummus moist. Once your hummus is portioned, sealed, and ready, you can place it into the freezer.
When you’re ready to enjoy your hummus, allow it to defrost in the fridge overnight. Stir it well to mix in any separated oil and restore its creamy texture. You may find the consistency to be slightly thinner after thawing, but a quick whirl in the blender or food processor can quickly fix this.
Freezing homemade hummus is not just practical, but it’s a fantastic way to ensure you always have a healthy snack on hand. It retains its flavours well and makes meal prep so much easier.
So the next time you’re whipping up a batch of your favourite hummus, don’t be afraid to make extra. Your future self will thank you!
In my culinary experiments, I often find that the secret to a good recipe is the ability to adapt it to your personal preference or pantry limitations. A frequent concern I hear is: what can I use instead of tahini in my hummus? If you’ve found yourself in a similar predicament, this guide is for you.
Tahini, a paste made from sesame seeds, contributes a unique nutty and slightly bitter taste to hummus. However, if it’s unavailable or you prefer a different flavour, several alternatives can fill in.
Firstly, consider using other nuts or seed butter. Almond butter, for example, provides a lovely nutty flavour. You can also opt for sunflower seed butter for a taste that closely mirrors tahini.
Another fantastic option is Greek yoghurt. It brings a creamy consistency to your hummus, with a pleasant tang. If you’re following a dairy-free diet, unsweetened almond or coconut milk yoghurt can work too.
My personal favourite tahini alternative is extra virgin olive oil. It enhances the richness of the hummus, while the distinct taste adds another depth of flavour.
In some cases, I’ve even made hummus without any tahini substitute, letting the chickpeas and garlic be the stars of the show. The result is a light and refreshing hummus, perfect for those preferring a milder flavour profile.
Remember, the essence of cooking is creativity. So, don’t worry if you lack tahini for your hummus. The alternatives not only work just as well but also allow you to personalize your hummus to your taste. So go on, experiment a bit, and create your unique hummus masterpiece!
One of the best things about hummus is its simplicity. It’s a delightful, creamy dip that doesn’t require complex techniques or exotic ingredients. But what if you don’t own a food processor? Can you still make hummus at home? The answer, I’m thrilled to say, is a resounding yes.
A food processor does make the process faster and easier, but it isn’t indispensable. In fact, in the Middle East, where hummus originated, traditional methods often involve mortar and pestle.
To make hummus without a food processor, you need a bowl and a sturdy fork or a potato masher. Start by mashing the chickpeas as finely as you can. This requires a bit of elbow grease, but think of it as a mini workout.
Once you’ve broken down the chickpeas, add the tahini, minced garlic, lemon juice, and olive oil. Continue to mash and stir until the mixture is as smooth as you can get it.
Next comes the water. Add it tablespoon by tablespoon, mixing thoroughly after each addition, until you achieve the desired consistency. Make sure to taste your hummus and adjust the seasoning if necessary.
The result might be a bit chunkier than the super-smooth hummus you get from a food processor, but it will still taste fantastic. In fact, some people prefer the additional texture in their hummus.
Making hummus without a food processor not only is doable but it also connects you to the authentic, traditional methods of hummus preparation.
So, if you’ve been holding back from making homemade hummus due to the lack of a food processor, don’t let that stop you anymore. Grab your ingredients, roll up your sleeves, and get ready to make some delicious hummus the old-fashioned way!
As someone who regularly prepares and enjoys homemade hummus, I’m constantly amazed by its versatility. It’s a staple in my kitchen because it complements so many foods brilliantly. Here are some of my favourite ways to serve hummus, transforming it from a simple dip into a culinary star.
The most traditional way to enjoy hummus is as a dip with pita bread or raw, crunchy vegetables. Bell peppers, cucumbers, and carrots are my go-to choices for a healthy and colourful platter.
But don’t stop there. Try it with grilled vegetables, like eggplant or zucchini. The smoky flavour pairs wonderfully with the creamy hummus.
Hummus also makes an excellent spread for sandwiches and wraps, adding a flavourful and nutritious touch. I often replace mayonnaise or butter with hummus in my sandwiches for a healthier alternative. Try it in a falafel wrap or a vegetable-stuffed pita sandwich – you’ll be pleasantly surprised!
Another intriguing way to serve hummus is alongside grilled or roasted meats. Its rich, tangy flavour works wonderfully to balance the hearty, savoury taste of the meat. I have served hummus with grilled chicken, lamb skewers, and even fish. It never fails to impress.
Lastly, consider using hummus as a base for a Mediterranean-inspired “bowl.” Start with a scoop of hummus, add some cooked quinoa or couscous, top with assorted vegetables, some grilled chicken or chickpeas, and finish with a drizzle of olive oil and a sprinkle of fresh herbs.
As you can see, hummus goes far beyond being just a dip. Its ability to enhance and complement a wide array of dishes makes it a culinary gem. So next time you whip up a batch of homemade hummus, let your culinary creativity run wild!
In my quest for healthier eating habits, I found myself drawn to hummus for its rich, creamy texture and its incredible nutritional profile. An interesting question I often encounter is about the dietary suitability of hummus. Is it vegan? Is it gluten-free?
The good news is that traditional homemade hummus, like our recipe, is both vegan and gluten-free. It is made from chickpeas, tahini (sesame seed paste), lemon juice, garlic, and olive oil – all plant-based ingredients with no gluten. Therefore, it can be safely consumed by those following a vegan or gluten-free diet.
Being vegan, hummus is an excellent source of plant-based protein, essential vitamins, and minerals. Chickpeas provide a generous amount of protein, making hummus a perfect snack or meal addition for those following a plant-based diet.
Similarly, for people with celiac disease or non-celiac gluten sensitivity, hummus offers a tasty and nutritious option. Just make sure to pair it with gluten-free crackers, bread, or a variety of fresh vegetables.
However, be mindful when purchasing store-bought hummus or when eating out. Some variations may contain additives or flavourings that are not vegan or gluten-free. Always read labels carefully or ask the restaurant staff if in doubt.
It’s also important to remember that while hummus is generally healthy, it is still relatively high in calories due to the tahini and olive oil. As with any food, it should be consumed in moderation as part of a balanced diet.
The simplicity and flexibility of hummus allow it to fit into a wide array of dietary choices.
Whether you’re a vegan, following a gluten-free diet, or just looking for a nutritious and delicious addition to your meals, hummus is a wonderful option. It’s truly a testament to the idea that healthy food can indeed be tasty and satisfying!
As someone who makes hummus regularly, I’ve discovered countless ways to add extra flavour to my favourite dip. Hummus is incredibly versatile and can be easily customized to suit your palate. Let’s explore some creative ways to elevate your homemade hummus.
First, consider the spices. While traditional hummus usually sticks to salt, there’s a world of flavour to be discovered in your spice rack. Smoked paprika, cayenne pepper, or cumin can add a warm, smoky note.
Turmeric or curry powder can introduce an intriguing depth of flavour. Experiment with what you have on hand and see what you like best.
Second, fresh herbs can significantly transform your hummus. Parsley, cilantro, or even dill can give your hummus a vibrant, fresh taste that complements the rich, creamy base.
Just add your chosen herb to the food processor along with your other ingredients, and you’ll have a beautifully green, herb-infused hummus.
Third, why not add some veggies? Roasted red pepper is a popular addition that gives the hummus a slightly sweet, smoky flavour. Avocado makes an ultra-creamy, rich hummus that’s sure to be a hit.
Even beetroot can be a surprising but delightful addition, providing a beautiful colour and a unique taste.
Finally, for a tangier hummus, consider adding additional lemon zest or a splash of vinegar. For an umami punch, try adding a spoonful of miso paste or a sprinkle of nutritional yeast.
Remember, the key is to start with small amounts and taste as you go. You can always add more, but you can’t take it back once it’s in the mix. Adding extra flavour to your hummus is a fun and creative way to make the dish uniquely yours. So the next time you make hummus, don’t be afraid to step outside the box and get creative!
As a passionate hummus maker, I am often asked how to make hummus smoother. The creamy, velvety texture is a characteristic trait of good hummus, but achieving that texture can sometimes be a challenge. Here are my tried-and-true tips for creating the creamiest, smoothest hummus.
Firstly, the quality and type of your chickpeas matter. Canned chickpeas are usually softer and easier to blend into a smooth paste, making them a preferred choice for many. If you’re using dried chickpeas, ensure they are thoroughly soaked and cooked until very soft.
Secondly, consider peeling the chickpeas. Each chickpea has a thin skin that can contribute to a grainy texture in your hummus. While it can be a bit tedious, removing these skins can result in noticeably smoother hummus.
Thirdly, the order of your ingredients matters. Begin by processing the tahini, lemon juice, and garlic first before adding the chickpeas. This helps to emulsify the tahini and lemon juice, creating a creamy base for the rest of your ingredients.
Next, consider the blending time. Don’t rush this step. Let your food processor run for a good few minutes. The extended processing time helps break down the chickpeas into a smoother paste.
Lastly, don’t forget the importance of water. Adding a bit of cold water, bit by bit, while blending helps to thin out the hummus and creates a fluffier, smoother texture.
Each of these tips contributes to achieving that dreamy, creamy consistency we love in hummus. While it might take a bit more time and effort, the resulting texture improvement is well worth it.
So next time you whip up a batch of homemade hummus, give these tips a try and enjoy the creamiest hummus ever!
Being a health-conscious foodie, I adore hummus not just for its delectable taste, but also for its numerous health benefits. Rich in plant-based protein, fibre, and healthy fats, hummus is a nutritional powerhouse.
However, there are ways to further boost its health quotient. Here’s how I like to enhance the health benefits of my hummus.
Firstly, I often add extra vegetables to my hummus. Whether it’s spinach, roasted bell peppers, or beetroot, these additions contribute additional vitamins, minerals, and fibre. Besides, they add an interesting twist to the flavour and colour, making the hummus more enticing.
Secondly, I experiment with various legumes. While chickpeas are the traditional choice, you can make hummus with lentils, black beans, or edamame, each with its own unique nutritional profile.
Lentils, for instance, are high in iron and folate. Black beans are packed with antioxidants, and edamame offers a good dose of Vitamin K and Omega-3 fatty acids.
Another way I boost my hummus’s health factor is by incorporating superfoods. A spoonful of chia seeds or flaxseeds adds a crunch, along with Omega-3 fatty acids and fibre.
A dash of turmeric provides anti-inflammatory benefits, and a sprinkle of nutritional yeast offers a cheesy flavour plus a dose of Vitamin B12.
Finally, I’m mindful of portion control. Even though hummus is healthy, it’s also quite calorie-dense due to tahini and olive oil. Ensuring moderate consumption is key to reaping its health benefits without exceeding your calorie needs.
Remember, these are just suggestions. The beauty of hummus is its flexibility. Feel free to explore and experiment with your recipe, and create a hummus that’s not only delicious but also packed with all the good stuff you want
As a lover of convenience without compromising on fresh, homemade flavours, I frequently prepare hummus ahead of time. Its flavour and texture hold up wonderfully, making it an ideal make-ahead dish. Here are my tips on how to successfully prepare and store your hummus for future enjoyment.
Making hummus ahead of time is as simple as following your favourite recipe. Once your hummus is prepared, transfer it to an airtight container. Smooth the surface with a spoon or spatula, then drizzle a thin layer of olive oil on top.
This oil layer acts as a seal, keeping your hummus fresh and preventing it from drying out.
Properly stored, hummus can last in the refrigerator for up to a week. It’s perfect for meal prep – prepare a batch on the weekend, and you’ll have a delicious, healthy dip or spread ready for the week ahead.
One thing I’ve noticed when refrigerating hummus is that it thickens slightly as it cools. If you prefer a creamier, softer hummus, allow it to sit at room temperature for a bit before serving. You can also stir in a little bit of water or olive oil to restore its original consistency.
Can you freeze hummus? Absolutely. Hummus freezes beautifully. Store it in a freezer-safe container (leaving some space for expansion), and it can last up to four months in the freezer.
When you’re ready to enjoy it, thaw it in the refrigerator overnight. You might need to give it a good stir before serving, as the texture can change slightly upon freezing and thawing.
Making hummus ahead of time is a practical way to always have a healthy and flavourful option on hand. With these simple tips, you can enjoy homemade hummus anytime!
Can’t get enough of the creamy deliciousness of our Hummus recipe? Then let’s go on an epicurean journey through the Middle East, a region known for its rich, flavourful dishes.
Firstly, I invite you to take a culinary dive into the world of Jeweled Rice. This isn’t just any rice dish. This is a feast of flavours, adorned with a treasure trove of jewels in the form of nuts, dried fruits, and aromatic spices. Each bite is like a tiny explosion of sweet and savoury goodness, making you yearn for more.
Secondly, who can resist a perfectly marinated and grilled Lamb Shish Kebab? I know I can’t. Imagine succulent lamb chunks, marinated in a symphony of spices, skewered and grilled to perfection. They are smoky, they are tender, and they are best enjoyed with a side of our very own Hummus.
Let’s not forget the Turkish Bread. Ah, the aroma of freshly baked bread, golden on the outside, soft and warm on the inside. Paired with the smooth creaminess of Hummus, this is a match made in gastronomic heaven.
Moving on, I encourage you to try our Turkish Chicken Wings recipe. Picture this: crispy, golden wings, infused with Turkish spices, and cooked to perfection. Each wing is a harmonious blend of crunch and flavour, promising a sensory experience you will not easily forget.
Last but not least, let’s spice things up with Spicy Potatoes. These aren’t just your regular potatoes. These are potatoes transformed. Imagine them seasoned with a special blend of Middle Eastern spices, then perfectly roasted. They’re crispy, they’re spicy, and they’re guaranteed to leave you craving more.
Remember, cooking is an adventure, a delicious exploration of cultures and flavours. I would love to hear your thoughts and experiences as you try these recipes. So, leave a comment and share the love. Let’s savour the flavours of the Middle East together!
Hi, I’m Nabeela and I love to cook! I want to share with you my favourite, delicious family-friendly recipes. I want to inspire you to create fantastic food for your family every day.
Subscribe to us to always stay in touch with us and get the latest news
about our company and all of our activities!